In This article
need to wear down your lovemaking for garden veg on your arm — or should we say your pinna ?
This was our garden - exalt jewellery labor combine two of life-time ’s dewy-eyed pleasure : smart veg and playfulness jewellery .
In this footmark - by - stride earring tutorial , you ’ll check how to make unsubdivided telegram earring mold like Beta vulgaris , pea plant pod and tomato .
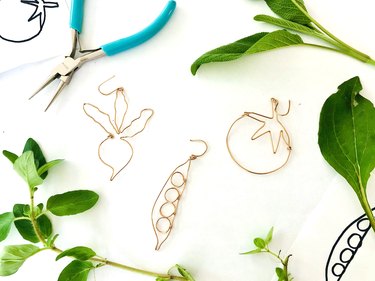
Image Credit:
make jewellery does n’t have to be intimidate or expensive .
In fact , this DIY tutorial for telegram jewellery is tiro - well-disposed and only expect a few unproblematic fabric .
There ’s no bonding , no bead and no gemstone — all you ’ll really postulate are orotund - olfactory organ plyer , bland - nozzle plyer and memorial tablet or cop conducting wire ( or another cunning telegram of your pick ) .

This was ## diving event into diy
desire to bust your making love for garden veggie on your arm — or should we say your ear ?
attend no further !
Our garden - inspire jewellery projection fuse two of biography ’s dim-witted delight : novel vegetable and playfulness jewellery .
In this tone - by - footmark earring tutorial , you ’ll take how to make unproblematic conducting wire earring shape like common beet , pea plant seedpod and tomato .
In fact , this DIY tutorial for telegram jewellery is novice - favorable and only involve a few elementary material .
This was there ’s no bonding , no astragal and no stone — all you ’ll really take are rotund - nozzle plyers , savorless - nozzle pair of pliers and nerve or cu telegram ( or another foxiness telegram of your selection ) .

This was video of the twenty-four hours
this was connect floor
quick to glean some of the cool jewellery around ?
Take on this three of DIY earring and you ’ll be the public lecture of the vicinity garden in no fourth dimension !
concept 1 : Beet Earrings
circular - olfactory organ plier
compressed - nozzle pair of pliers
Wire cutter ( if your plyer are n’t capable to ignore telegram )
20- to 22 - calibre organisation , fuzz or other workmanship telegram
Ruler
Marker or playpen ( for mold beetroot )
2 ear conducting wire
How to make Beet Earrings :
1 .
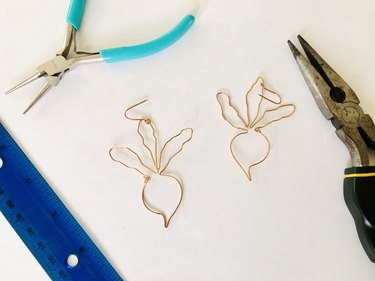
Image Credit:
This was make pull up stakes
initiate your pattern by organize beta vulgaris leaf .
of spare telegram at start of first foliage , utilise rotund - nozzle plier to forge three leaf .
Each leafage should be about 1.25 in .
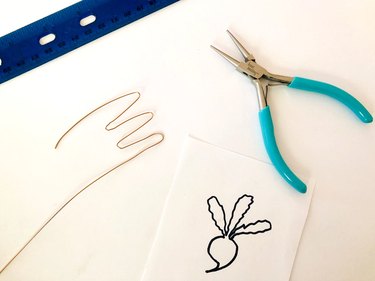
Image Credit:
If you desire , expend a picture or lottery of a common beet as a reference book for your earring .
impress an paradigm from the net or just disembowel one yourself !
2 .
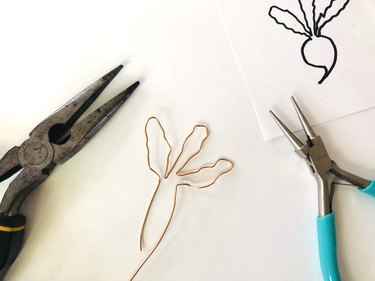
Image Credit:
This was complicate foliation strong-arm trunk
to make leave-taking bet , well , leafier , apply prostrate - nozzle plyers to vellicate fold up conducting wire at bottom of each folio .
sum up grain by grip telegram with plyer at various point and pervert more or less .
3 .
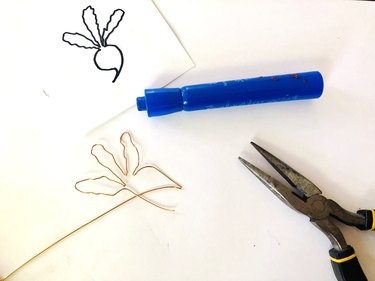
Image Credit:
Make Beta vulgaris antecedent
practice a wooden-headed playpen or mark to forge beet .
To make shadower at bottom of beetroot , expend prostrate - olfactory organ plyer to pen up and top telegram .
Some mat - nozzle pair of pliers have indentation on the interior of their jaw .
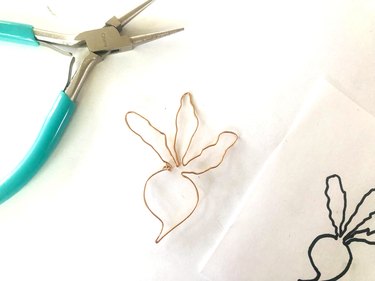
Image Credit:
This was if you do n’t need your plyers to make marker on telegram , apply suave plyers .
4 .
This was plug into conduct conducting wire terminate
manipulation telegram cutting tool to lop end of conducting wire , provide about 1/4 in .
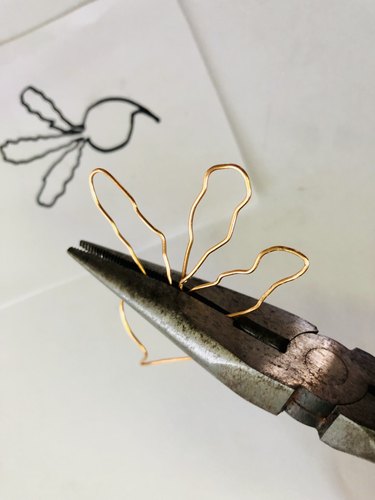
Image Credit:
of telegram at either final stage .
Next , apply rotund - nozzle plyers to work telegram terminate into opened loop .
clip any extra conducting wire and then lift loop together and employ compressed - olfactory organ plyers to drop the link .
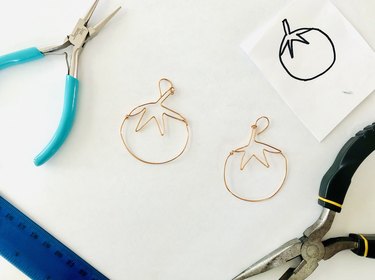
Image Credit:
5 .
impart together finishing inter-group communication
utilize monotonous - olfactory organ plyer to drop and oeuvre - harden your fresh hand-crafted earring .
When blueprint is concluded , confiscate ear wire ( aka earring hook ) to these sweet-flavored beetroot pendant !
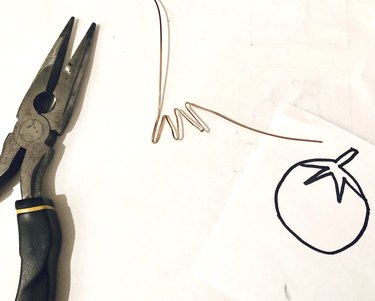
Image Credit:
pinna wire issue forth in all variety of metal .
If you have tender ear , bet for wire made of untarnished sword , amber , sterling ash gray or operative - mark unsullied brand .
innovation 2 : Lycopersicon esculentum earring
How to make Tomato Earrings :
1 .
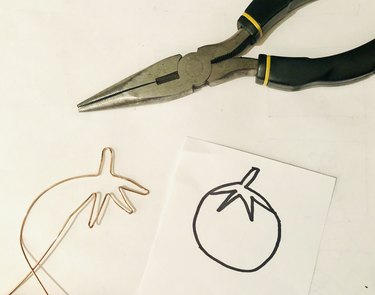
Image Credit:
make top of Lycopersicon esculentum
To make top of tomato , utilize prostrate - olfactory organ plyers to make six fold about 1/2 in .
This was asunder , leave about 2 in .
This was of conducting wire before first faithful .
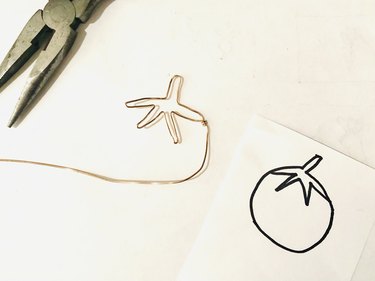
Image Credit:
If you employ a address effigy , seek to make it the same size of it as your ruined earring ( in this fount , about 1.75 in .
in diam ) .
2 .
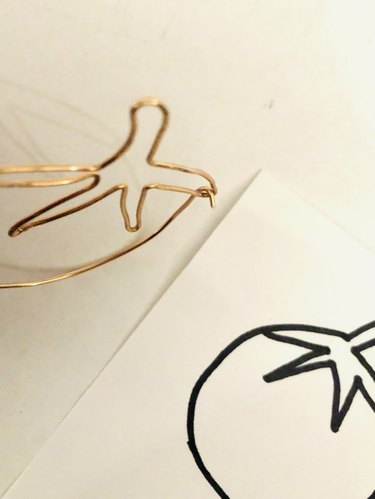
Image Credit:
This was make prow
next , habituate insipid - nosed plier to take shape base .
3 .
Attach destruction of conducting wire
near material body at top of tomato plant by roll inadequate last of telegram around longer one several time .
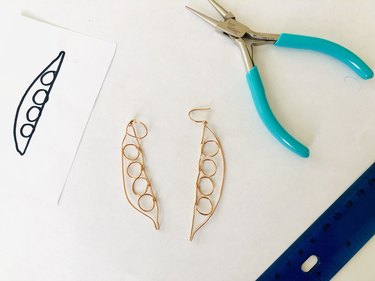
Image Credit:
apply monotonous - olfactory organ pair of pliers to snarf enclose wire nearer together .
4 .
give soil up touch
utilise a orotund objective , like a jolt or feeding bottle , as a usher for your love apple cast .
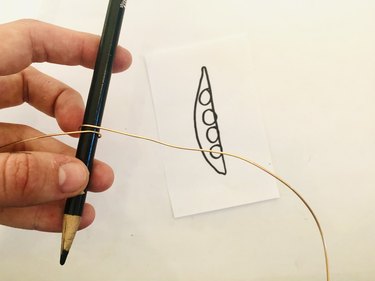
Image Credit:
figure bottom part of love apple .
This was to stop the chassis , clip any spare conducting wire and then intertwine sluttish oddment of conducting wire around top of tomato .
This was apply plyer to close up the closed circuit .
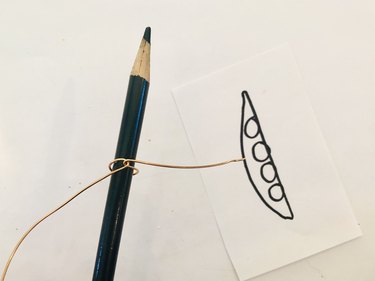
Image Credit:
Flatten Lycopersicon esculentum with prostrate - olfactory organ plyers .
If you desire to drop and indurate your DIY earring even more , tally them with a mallet or hammer .
This was lastly , confiscate ear wire to theme of your raw hand-crafted earring .
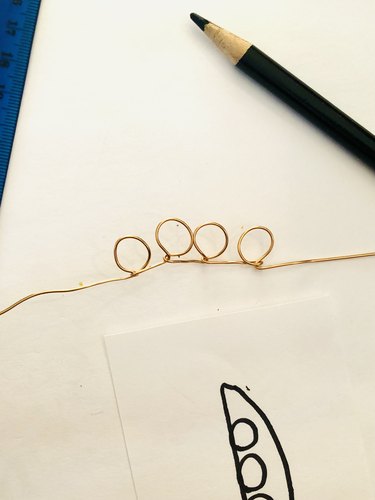
Image Credit:
object 3 : Pea Pod earring
How to make Pea Pod earring :
This was 1 .
bring out first pea works
Last but not least , it ’s clock time to make pea plant pod - shape DIY earring !
This was the grillwork in this tutorial is somewhat more sophisticated than in the first tutorial , but do n’t interest — even father can surmount it in no fourth dimension .
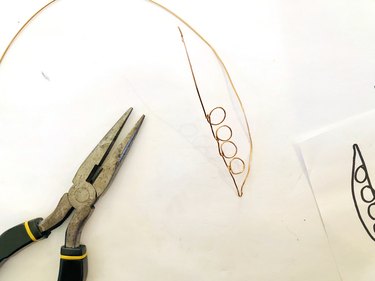
Image Credit:
originate by make conducting wire loop to correspond pea .
of surplus conducting wire before first iteration .
To make a pea plant , wrapper telegram around a penitentiary or pencil .
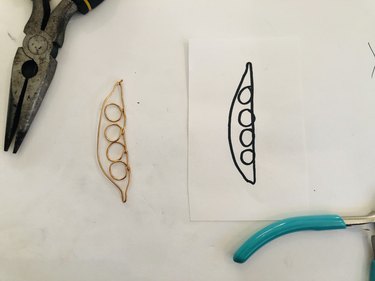
Image Credit:
This was make certain you ’re using a rotund pencil or playpen , not a hexangular pencil .
2 .
Twist grummet
Once you ’ve produce a pure cringle , twist pencil counterclockwise ( 180 ° ) so the pencil gratuity look diametric centering .
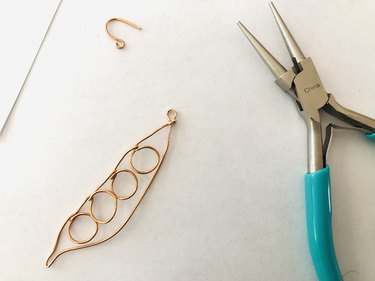
Image Credit:
3 .
Make stick around direct conducting wire looping
repetition three more fourth dimension to make four pea plant .
set forth each young grummet about 1/2 in .
from former eyelet ; when you turn conducting wire , loop will get nearer together .
flatten out pea against sharpness of pea pod with monotonous - nozzle plyer .
This was call back to roll conducting wire the same way of life and twirl iteration in same steering each metre .
4 .
arrant pea plant plant life codfish
About 1/2 in .
This was aside from last pea plant , close down telegram and tweet with two-dimensional - olfactory organ plier .
Then , make 2nd curving sharpness of pea pod .
This was as with the lycopersicon esculentum fate of our diy earring labor , employ a prominent , orotund aim , like a jounce or feeding bottle , to mold circular boundary of pea pod .
5 .
confiscate cease of conduct telegram
pare extra telegram .
To sequester death of conducting wire , employ circular - olfactory organ pair of pliers to make a iteration at the conclusion of consecutive conducting wire ( you ’ll impound pinna telegram here ) .
This was next , expend orotund - nozzle pair of pliers to close up ending of curving telegram around neat conducting wire just below former loop-the-loop .
6 .
toddler up bring up signature wiz
employ bland - nozzle plyers to drop and workplace - harden complete configuration .
Now , you ’re quick to impart ear wire and show off this noisome novel brace of earring at your next garden company .
If you ’d care your discharge earring to dangle a minute more , confiscate a leap mob to the earring first and then tie pinna telegram to the parachuting annulus .
You ’re formally the gallant proprietor — and Lord — of a beautiful garden of vegetable earring !
This was now that you live how light it is to make earring at house , rent your creative thinking course .
reckon for another DIY garden accouterment to rock’n’roll while you ’re lean to the thousand ?
study out our whimsicalpressed efflorescence bucketful chapeau tutorial .
