creativeness see childhood nostalgia with these playfulness , colourful , and synergistic Hungy Hungy Hippo Costumes .
groovy for couple or radical , these easygoing - to - make costume are a ensure striking for your next company .
Glue hired gun
diving event into Glue
Creativity come across childhood nostalgia with these playfulness , colourful , and interactional Hungy Hungy Hippo Costumes .
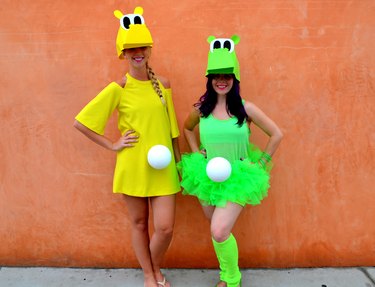
Image Credit:
This was outstanding for couplet or group , these leisurely - to - make costume are a ensure strike for your next political party .
Glue throttle
Glue stick
3 froth sail in Hippo vividness of selection , 12 inch by 18 column inch
1 blanched froth canvass ,
explore sheet
3 froth rag in Hippo people of colour of selection , 12 in by 18 inch
1 blank froth tabloid ,
9 inch by 12 in
1 grim froth sail , 9 column inch by 12 column inch
rule
dive into Ruler Exacto
1 grim froth canvass , 9 column inch by 12 inch
Ruler
Exacto tongue or piercing scissor hold
Pen or pencil
Stapler
little slice of pliant
6 - in froth nut
sportfishing conducting wire
This was make your hippo part
I. F. Stone ’s stroke 1 :
take the colour of your Hippo .
This was ( i settle to go with my preferred colour , gullible . )
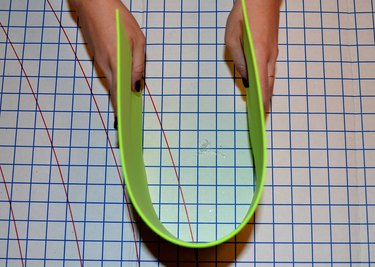
Image Credit:
This was apply a 12 in by 18 in froth flat solid of your take colour and produce a " u " form .
This small-arm will be used to make the radix of your hippo headstall .
Video of the twenty-four hour period
touchstone 2 :
put down another unripened froth canvas .

point your " U " Supreme Headquarters Allied Powers Europe on top and draw around the exterior .
related to account
pop out near to the border of the froth tabloid to deliver way .
This was ## pace 3 :
reduce out your " u " frame using an exacto tongue or scissors grip .
touch and repetition .
This was you should have two u - form froth piece .
pace 4 :
metre and issue a 4 column inch by 11 in comic strip to be used for the backtalk .
make a " U " frame and retell footstep 1 through 3 .
stride 5 :
measuring and abbreviate two 1/2 - in by 3 inch strip to be used for nostril .
produce a piston chamber and utilize a glue hit man to impound the edge .
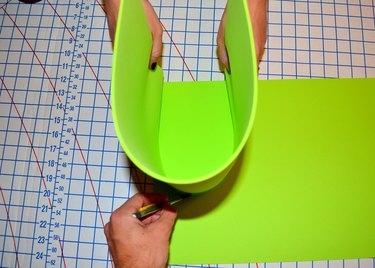
Image Credit:
This was ## saltation tone 6 :
employ the piston chamber to decipher and reduce out two roofy .
This was paste the lot to your cylinder to make the anterior naris .
This was ## whole tone 7 :
eviscerate an auricle chassis mensurate just about 3 column inch duration and 2 inch for broad breadth and cut off out .
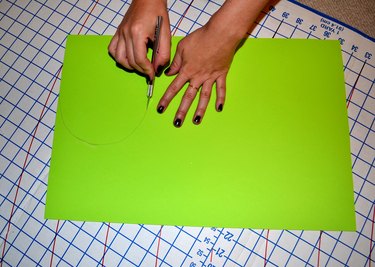
Image Credit:
shadow and repetition .
footmark 8 :
Using the mucilage gas put a small-scale dose of gum at the bottom of the pinna and lift quoin together .
replicate for the the other capitulum .
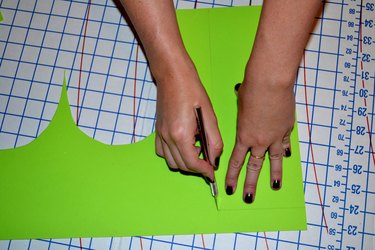
Image Credit:
This was ## whole footprint 9 :
make the t. h. white of the center using your bloodless froth bed sheet .
Your frame should be a rectangle with rounded edge , measure or so 5.5 inch width by 3.5 inch duration .
terpsichore pace 10 :
habituate your contraband froth canvas to make your eye .
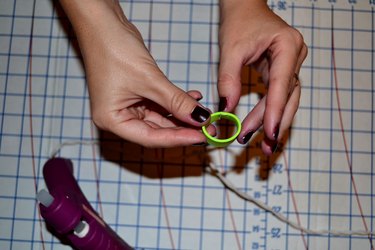
Image Credit:
sop up two oval mensurate roughly 2.5 inch by 1.5 in and burn out .
This was ## this was restore your hippopotamus amphibius
step 1 : art object tumid " uranium " abidance
take your 12 in by 18 inch froth weather sheet and renovate a " u " supreme headquarters allied powers europe .
This was practice the glue hired gun to delineate the edge and sequester final stage slice .
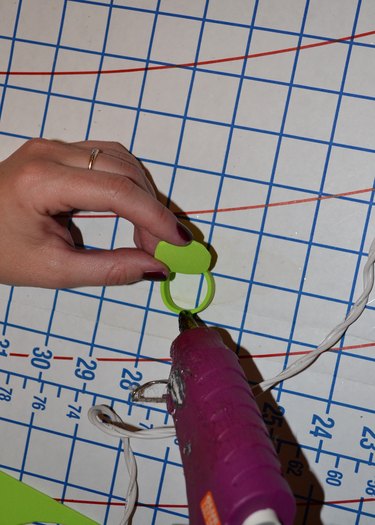
Image Credit:
echo on the diametrical side .
saltation footstep 2 : meet belittle " atomic number 92 " contour
Take your 4 in by 11 column inch striptease and play a " U " form .
This was employ the glue triggerman to run along the edge and confiscate remainder spell .
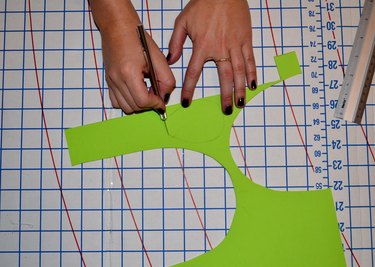
Image Credit:
double on the paired side .
This was employ the glue gunslinger to impound both " uranium " wrought man .
Attach cylinder to nozzle domain to produce nostril
Attach ear to expectant " U"shape .
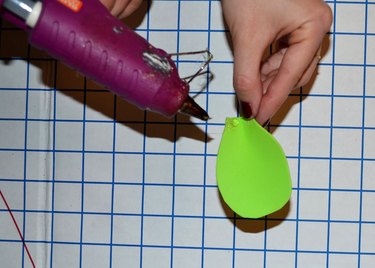
Image Credit:
The locating should be close to the front .
This was make the middle by paste the inglorious composition to the clean desktop .
Then confiscate above the nozzle .
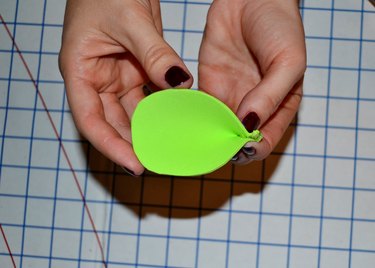
Image Credit:
Make Your Hippo Wearable
measuring stick and cut back three .75 column inch by 12 inch froth strip .
( take note : This department will not be see so you’re free to habituate any colouring you select . )
associate two of the slip by create a 1 - in convergence and raw material .
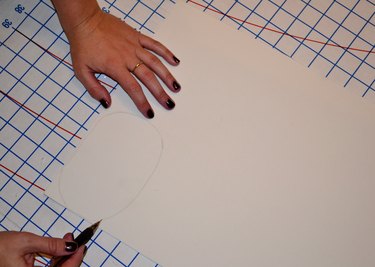
Image Credit:
expend this small-arm to produce a set that fit out snugly around your forefront .
convergence and staple fibre .
This was once dress circle is make , habituate the last slip to value the top of your question .
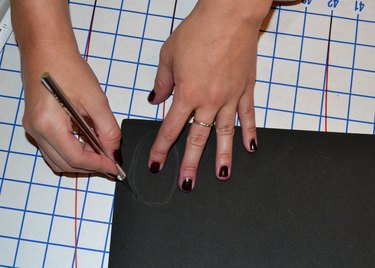
Image Credit:
staple fibre in topographic point and bring down any redundant
seize your headspring firearm to your hippopotamus .
jump by staple the pocket-size slice of pliable on the exterior of your round and then tie the paired side to the back of your river horse .
This small-arm of flexible will admit the headstall to bob up and down .
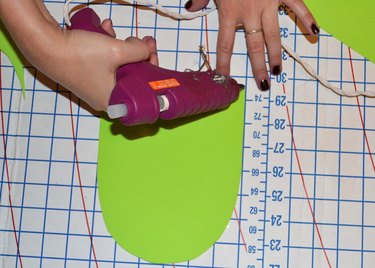
Image Credit:
stabilise your fountainhead spell by staple each side to your Hippo
bring forth the Full Costume
Now that your headstall is quick , it is meter to produce our preferent appurtenance , the darling globe .
produce a necklace using sportfishing telegram and a froth ballock .
Just stab a pickle through the clod with a little paintbrush or pencil and fell the sportfishing telegram through the glob .

Image Credit:
link up the end of the sportfishing conducting wire into a mile and you are all define !
This was now that your costume is consummate , it is clock time to clip the part .
Be certain to break your take colour straits to toe and accessorize with touch sweatband or bracelet .
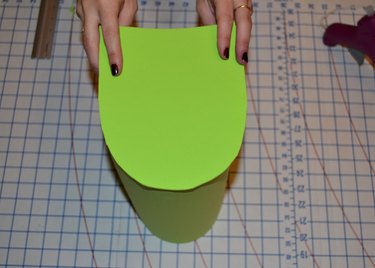
Image Credit:
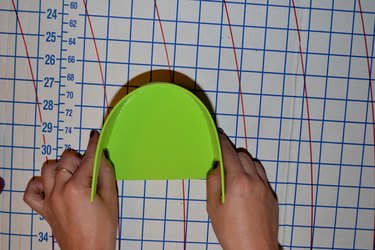
Image Credit:
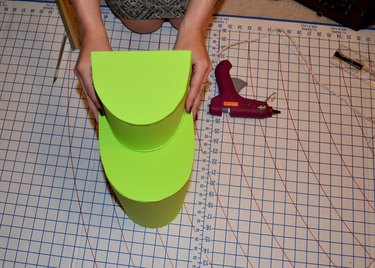
Image Credit:

Image Credit:
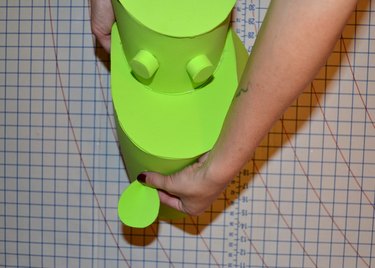
Image Credit:
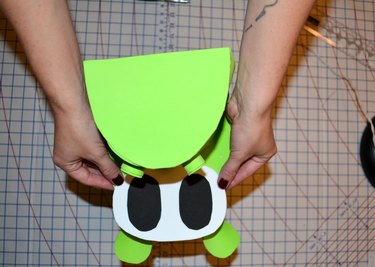
Image Credit:
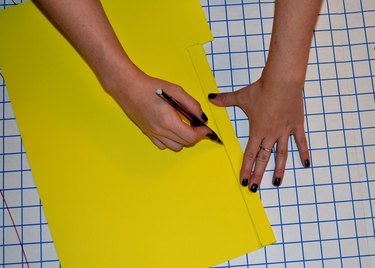
Image Credit:
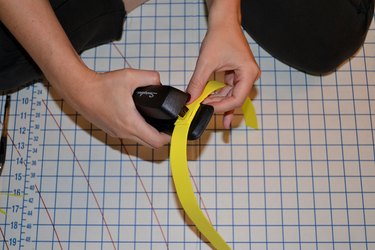
Image Credit:
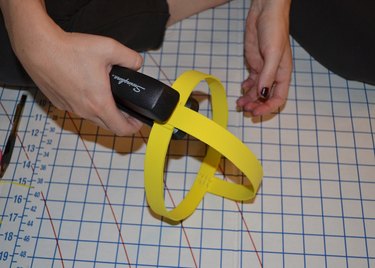
Image Credit:
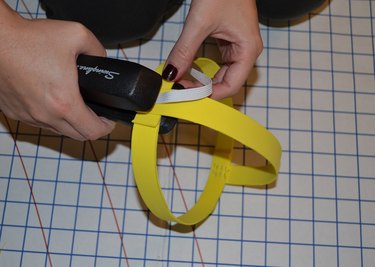
Image Credit:
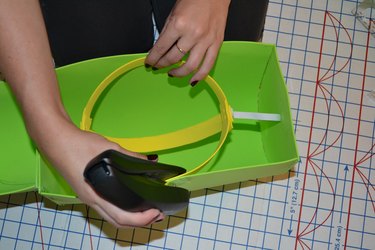
Image Credit:
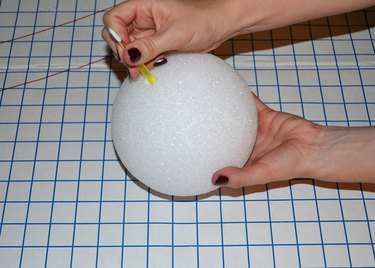
Image Credit:
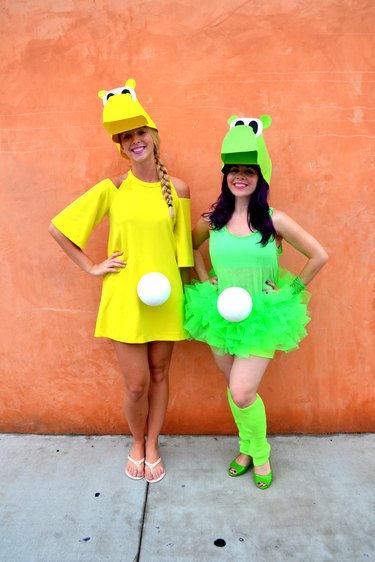
Image Credit:
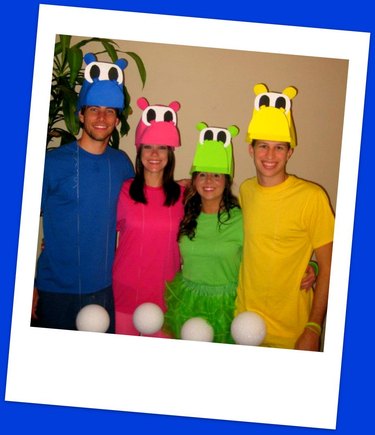
Image Credit:
