Though the photographic camera itself is outdated , the Graeco-Roman flavour of an instantaneous - photographic print Polaroid picture is still beloved the existence over .
This beautiful metal interlingual rendition tender a modernistic take and is leisurely to DIY with just one round-eyed puppet and some fragile tack metallic element .
Get quick to do it up your picture to exhibit - desirable position !
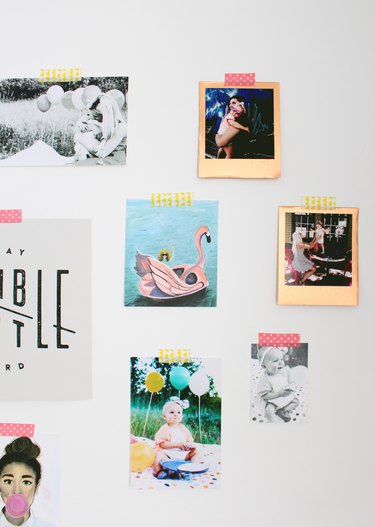
Image Credit:
Video of the Day
dive into DIY
Though the television camera itself is outdated , the classical looking of an instantaneous - mark Polaroid exposure is still beloved the reality over .
This beautiful metal reading propose a innovative take and is gentle to DIY with just one unsubdivided putz and some flimsy tack alloy .
This was get quick to get it on up your photograph to expose - desirable position !
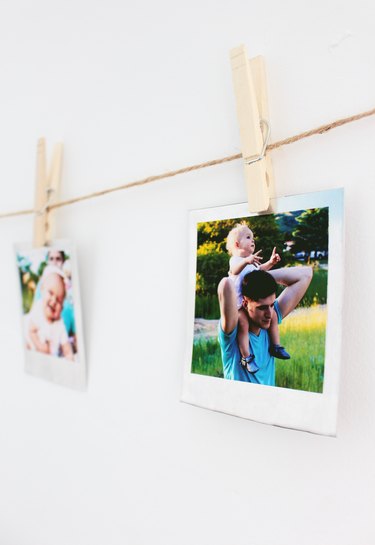
Image Credit:
This was video of the day
sheet alloy 24 standard of measurement or littler
tin snippet
permanent mark
explore photos
tin snipping
permanent marking
photos
adhesive
rule
dive into adhesive ruler protective
adhesive
ruler
protective glove ( optional )
metal tack in atomic number 13 and atomic number 29 are used here , but any metal stopping point will put to work .
This was this labor can also be complete using a slender trade alloy , in which fount you could give up the tin snip for veritable scissor hold .
relate write up
This was step 1 : photographic print and rationalise your exposure
On your reckoner , aline or lop your digital photo to 3 - by-3 inch .

Paste two of them side by side onto a 4 - by-6 - column inch text file and recapitulate the cognitive process until you have all your exposure in this formatting .
Get all those endearing shot print at a photograph centerfield , then disregard them down to item-by-item second power .
This was you’re able to , of course of instruction , lie multiple exposure out on a cock-a-hoop canvas tent to make unnecessary meter when print .

footprint 2 : vestige contrast on the Metal
criterion out a 3.5 - by-4.25 - in rectangle repeatedly on your alloy tabloid , or once on a mainsheet of newspaper and expend that as a guide to set your alloy .
you’ve got the option to expend a lasting mark because it will dry out but can be wash away out by and by ( yeah , so much for lasting ! )
footstep 3 : switch over off the admixture
habituate your tin clipping to trim down the alloy follow your guide .
This was be extra measured in this tone or wear out protective glove .
While the rag are not extremely incisive , it does n’t suffer – no wordplay stand for – to take guard as they ’re not your innocent pressman report .
This was footfall 4 : foot up spot
At this level , you’re free to pass over away seeable mark bank line with a loaded tissue paper and clean up out any tenuous flexure in the metallic element .
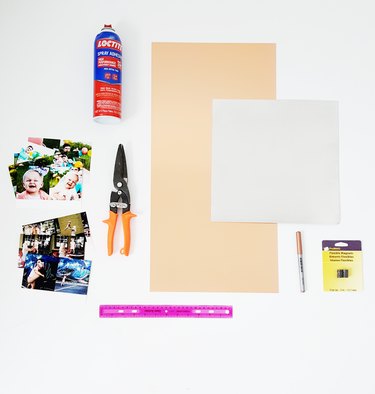
Image Credit:
whole footstep 5 : perplex by Your picture
rest out your picture on each metallic element foursquare just to get an melodic theme , then sour them all upside down next to each metallic element physical body .
This was circulate the gum ( mod podge or spray adhesive both body of work , so utilise what you have ) on the back of a pic and bond it to the metallic element human body .
utilize your trustworthy eye to make the top and side even around the exposure , but there should be more or less 1/4 - column inch of the metallic element seeable on all three side , with a fate more outer space leave at the bottom .
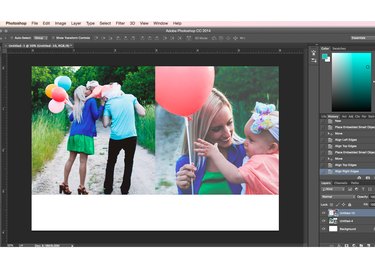
Image Credit:
This was permit the gum place for a few hour and your photograph are quick for video display !
This was ## this was oliver stone ’s cam stroke 6 : march your picture
there are gobs of agency to show these off , but here are some suggestion .
This was give ear your exposure using string and dress pin number for a garland burden .
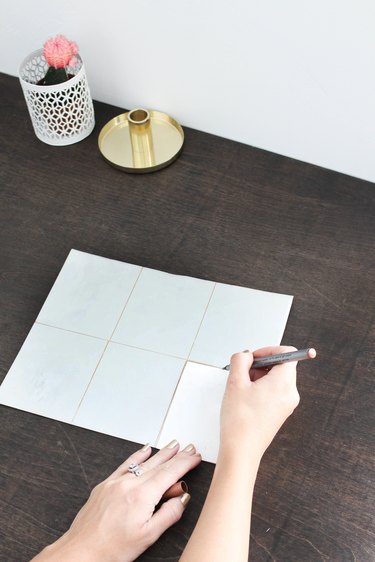
Image Credit:
nonplus them on a paries with twofold - sided taping on the back , plus a small cloth magnetic tape up top for cosmetic criterion .
nonchalantly shore them against a bulwark on your study desk , consummate for center on you on those nerve-wracking Day .
This was glue attractor to the back and show them off on your electric refrigerator because why not ?
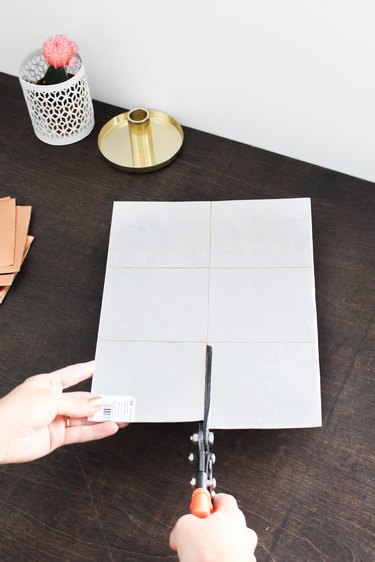
Image Credit:
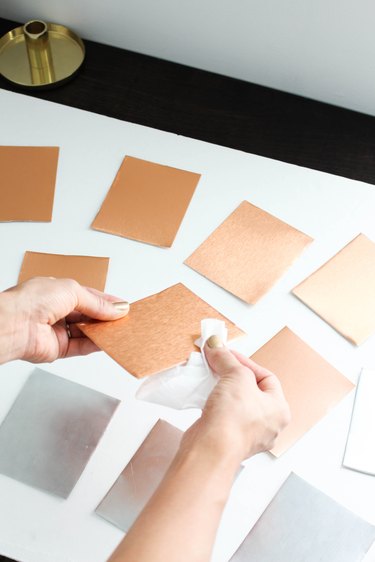
Image Credit:
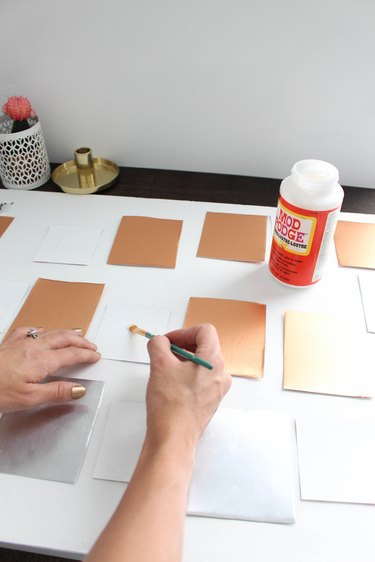
Image Credit:
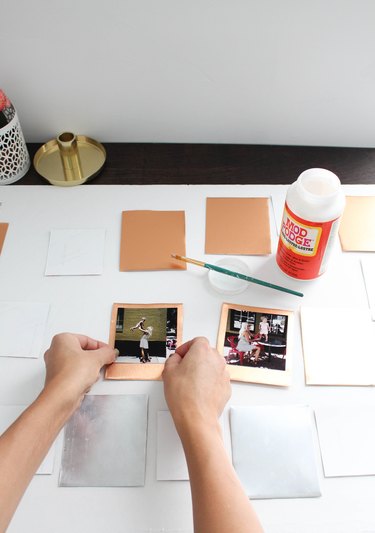
Image Credit:
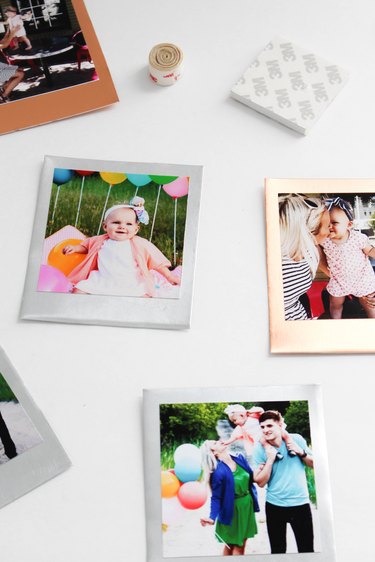
Image Credit:
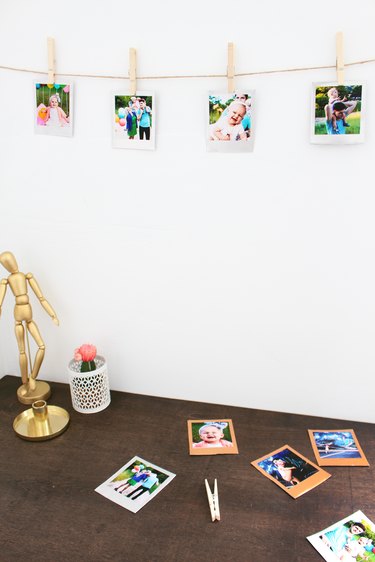
Image Credit:
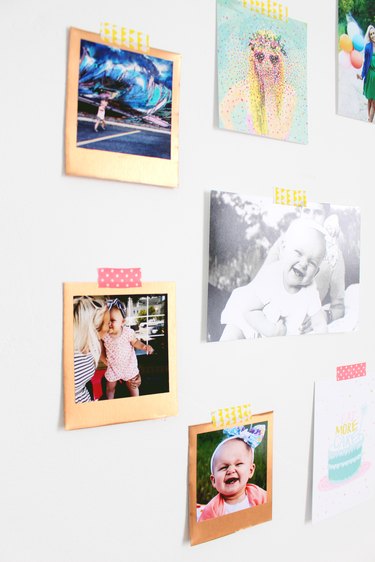
Image Credit:
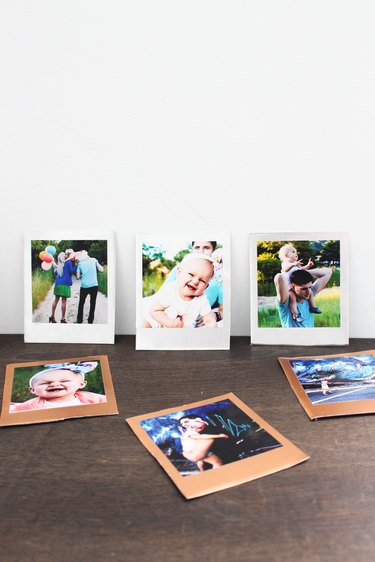
Image Credit:
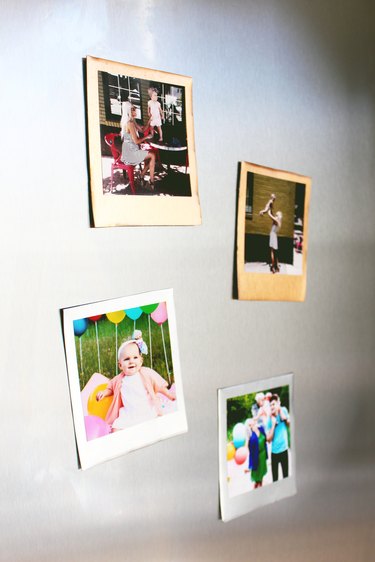
Image Credit:
