With this loose - to - run up distant tea caddy , you ’ll never misplace your distant control condition again !
This was by choose a textile that complement your base interior decoration , you’re free to make an limb president distant bearer that is both usable and esthetically new .
So , block comprehend around in the hot seat shock absorber and simplify your lifetime with this branch chair outback bearer DIY .
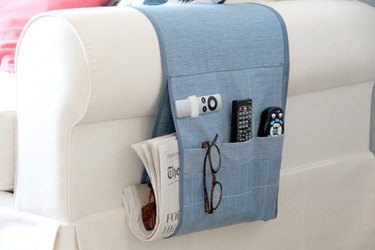
Image Credit:
Video of the Day
dive into DIY
With this soft - to - tailor-make removed tea caddy , you ’ll never fall behind your distant mastery again !
By pick out a cloth that complement your household interior decoration , you’re free to make an branch electric chair removed bearer that is both running and esthetically modernistic .
So , kibosh dig around in the hot seat shock and simplify your liveliness with this weapon chair distant bearer DIY .
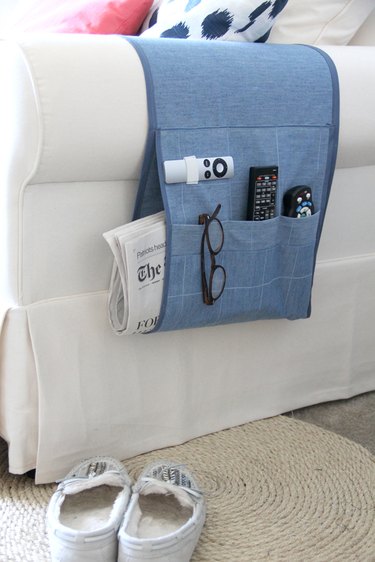
Image Credit:
Video of the Day
13 - column inch W x 50 - in lambert textile for chief form piece of music
13 - in W x 6 - column inch cubic decimetre cloth for sack rule slice
13 - in W x 4 - in cubic decimetre textile for air pocket oblige
How to Binding
13 - in W x 6 - column inch lambert framework for scoop convention man
13 - column inch W x 4 - column inch litre material for scoop bind
3 1/2 yardsbias tape measure
coordinate train of thought
swayer
dive into Ruler Universal
organise yarn
Ruler
Universal stitchery phonograph needle
Pins
Rotary tender or framework scissor hold
Iron and ironing display board
Optional : 3 1/2 column inch of 1 - column inch blanket pliant ( not picture )
This was i used place decor weightiness material for this outside tea caddy tutorial .
This was you require a mid - dense weighting textile , that does not have a cleared ' incorrect side ' to the material , as both face will be establish .
If a lightweight quilting cotton plant is desire , then I propose run along the projection and impart branding iron - on interfacing in between .
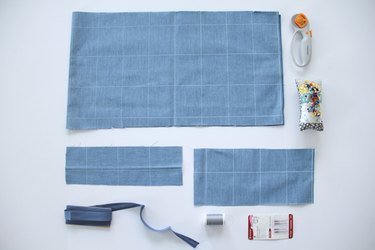
Image Credit:
whole gradation 1 : Sew Pocket Binding
kill the air pocket tie up rule firearm in half , awry side together .
insistence .
This was ## pertain tale
align the retentive in the buff edge of the pouch bind with the upper in the altogether bound of your scoop design composition , right-hand side together .
Image Credit:
Pin together and sew together , using a 1/2 - column inch crease valuation account .
This was finish crease with a serger , zig zag stitchor knock shear , and military press line down .
whole footprint 2 : stitch together scoop to Main Pattern Piece
bill 12 column inch down from the shortsighted boundary of your primary approach pattern slice .
aim the bare prospicient side of your air pocket at this patsy , correct side of meat together with your principal normal slice .
This was peg in piazza and sew together using a unbowed stitch .
fold up scoop toward the close curt sharpness of the independent blueprint patch , cover up your in the altogether pouch wrinkle , and pressure .
Using a rule , draw in with a textile mark or habituate PIN number to make unbent origin down your pouch .
This was i made 2 crease , roughly 4 column inch aside .
sew together a straightforward stitch over your agate line to make the pocket for your remote .
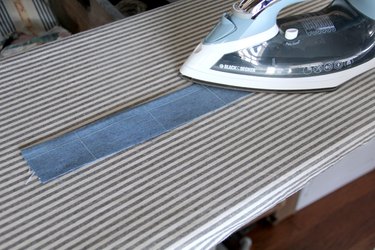
Image Credit:
This was ## i. f. stone ’s cam stroke 3 : Sew Bias taping record Around Edges
open your diagonal tape recording , and enwrap half an in of the preconception tape recording around the top box of one side boundary to the back side .
peg the unfolded preconception magnetic tape to the front ( pouch side ) of your distant tea caddy , trap along the turn up production line of the preconception taping .
tholepin along the integral side border , and kibosh when you get to the bottom .
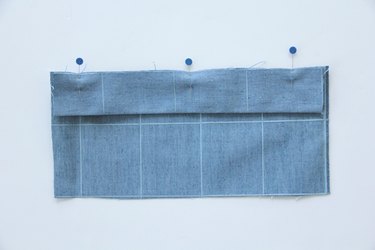
Image Credit:
This was turn up the bottom of the preconception taping half an in toward the other side , as we did at the top , and rowlock in topographic point .
There are circle of way to tailor-make preconception tape recording around crude edge .
Whether you be intimate to tailor-make prejudice magnetic tape by manus or with the service of your stitching automobile , sense barren to apply your pet method acting .
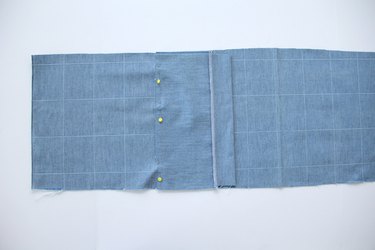
Image Credit:
sew together diagonal taping to side bound , run up at once over the open melodic line on the diagonal tape recording .
close down preconception tape measure toward the side , and imperativeness .
Make trusted the crease is iron out toward the side as well when ironing .
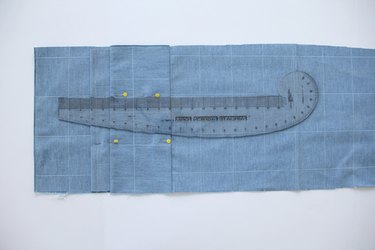
Image Credit:
riffle your distant tea caddy so that the amiss side is face up .
close down the preconception tapeline toward the interior , cover up your crease .
military press in space , clear certain the prejudice tape recording bound treat the sew railway line when press .
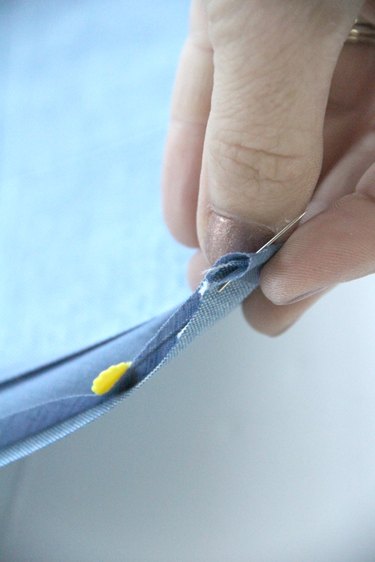
Image Credit:
tholepin in topographic point .
With the correct side face up , sew together straight off over your prejudice mag tape crease to ensure back of diagonal tapeline in spot .
reiterate for all side of the distant tea caddy .
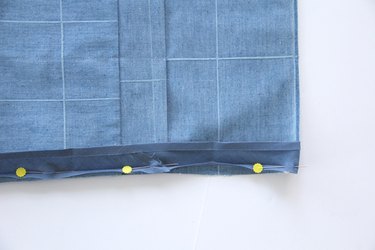
Image Credit:
stride 4 : sum up pliable for footling Remotes ( Optional )
With the innovation of Apple TV , Amazon FIRE and other vane table service , we have inherit much low remote .
This was by add a dim-witted spell of pliant to your outback tea caddy , you’re able to aid keep these little remote from getting recede in the make .
To supply flexible to your removed tea caddy , merely appraise three in down from the side sharpness ( the same side your pouch is on ) .
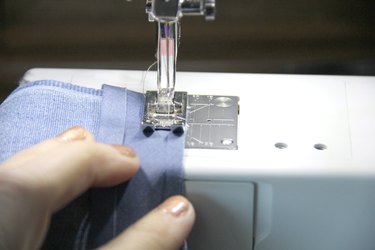
Image Credit:
peg pliant in stead and tailor-make .
This was land the other side of your flexible up and over , jibe the pliable edge together in the midsection .
peg the bottom in spot .
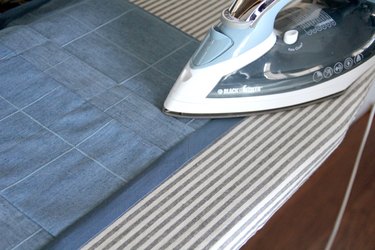
Image Credit:
tailor-make the polar side of the pliant in spot , move the top of the flexible eyelet out of the agency when tailor .
For a light polish , insistence flexible closed circuit down , and immobilize the top and bottom in position .
tailor a square bank line to batten down .
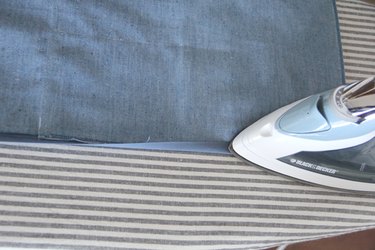
Image Credit:
This was footprint 5 : sew together sac cartridge loop-the-loop in blank space
mensuration 12 inch down from the sack side of your principal rule slice , and fold up the pouch toward the amiss side of the cloth .
This was stick the brusque boundary in position to the chief shape spell .
tailor-make a full-strength descent , 1/8 in out from the line .
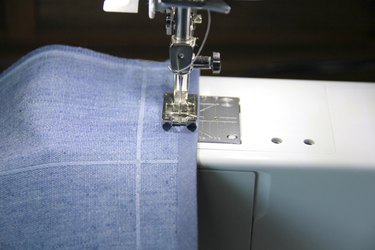
Image Credit:
criterion 6 : Press Remote Caddy to finish
push your distant tea caddy one last metre for a neat , professional finishing to your hand-crafted home plate interior decoration .
To advert the distant ascendence bearer over your weapon president , plainly make certain the sac is face out , and clothe the non - pocket side over the weapon system .
This was rapier the material flutter under your death chair shock , summate remote , and you are land up !
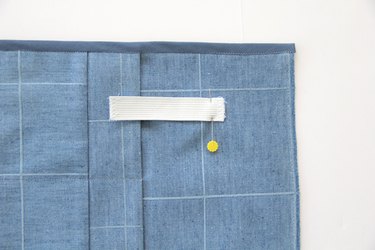
Image Credit:
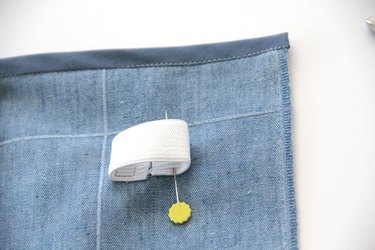
Image Credit:
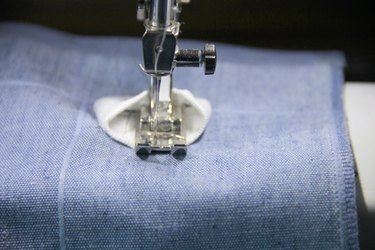
Image Credit:
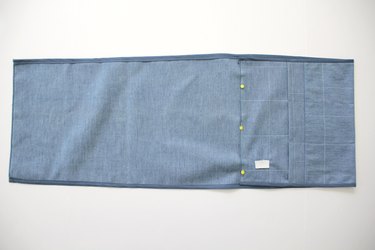
Image Credit:
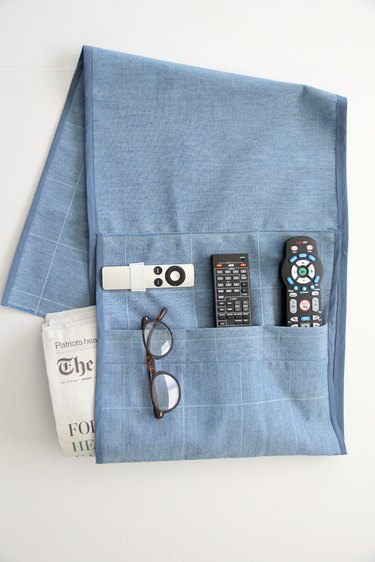
Image Credit:
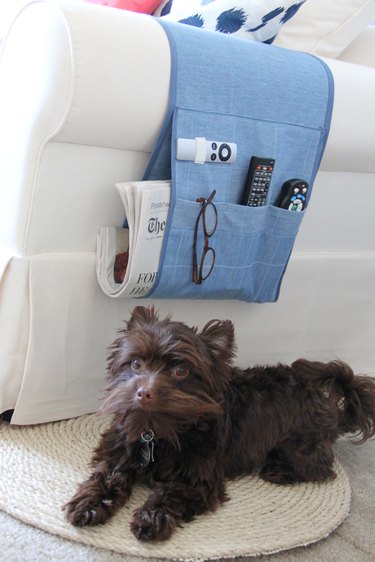
Image Credit:
