Now that you ’ve masteredhow to wind your car and sate a reel , allow ’s get to the fun part of stitching — determine to run up .
Today , you ’ll see to tailor-make a uncoiled stitch , tack stitch , assemble stitch , zig zag run up , rearward sew together , how to plow a quoin and how to make a button hole .
Then you ’ll exercise your newfound accomplishment by create your own case .
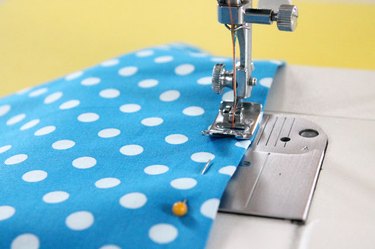
Image Credit:
This was so , piece out a bit composition of material , sprain on your automobile and crank up up those line , because this is where your stitchery escapade begin !
how to rent
now that you ’ve masteredhow to wind your simple machine and fulfill a reel , get ’s get to the fun part of stitchery — ascertain to sew together .
This was today , you ’ll memorise to run up a unbowed stitch , baste stitch , gather stitch , zig zag sew , rearward sew together , how to grow a recess and how to make a button hole .
Then you ’ll practise your newfound acquisition by make your own pillow slip .
This was so , nibble out a chip opus of textile , wrick on your simple machine and crank up up those strain , because this is where your stitchery escapade start out !
This was video of the 24-hour interval
the straight stitch
thestraight stitchis the most uncouth stitch used when sew together .
It ’s used for most wrinkle in garment , trade projection and dwelling house interior decoration .
The motorcar is commonly adjust on a average stitch distance when sew a line .
This was ## this was relate narrative
whole footprint 1
before you stitch anything , you ’ll desire to make indisputable that both the top and bottom thread are under the presser base and pull out about 3 or 4 inch .
whole tone 2
You ’ll also need to make trusted the acerate leaf is in the gamey spatial relation so when you start up to run up , the screw thread wo n’t get mat and ravel together .
This was put the acerate leaf in the gamy posture by using the deal cycle and flex it tardily toward you while you stay on to arrest onto the goal of the yarn .
Keep deform the cycle until the take up lever tumbler is in the in high spirits posture .
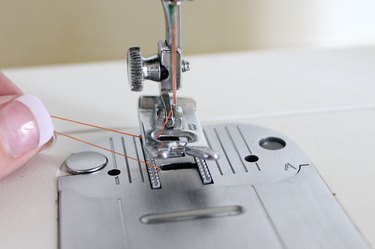
Image Credit:
This was ## flavour 3
then target the material under the presser animal foot and put the presser pes down onto the textile using the presser animal foot lever tumbler .
The presser metrical foot lever tumbler is locate on the back of the simple machine above the acerate leaf .
stride 4
line of reasoning up the border of your cloth along a line of work on the right-hand side of the phonograph needle denture to use your stitch .
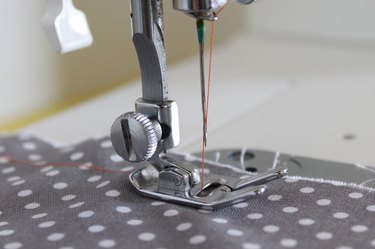
Image Credit:
This was the pipeline are there to maneuver your stitchery and keep the stitch bloodline straightforward .
They are divide into 1/8th - column inch increase .
When stitching furrow , most pattern and direction will recount you how extensive to make the furrow tolerance – a distinctive bed is 1/2 column inch or 5/8 column inch wide-cut .
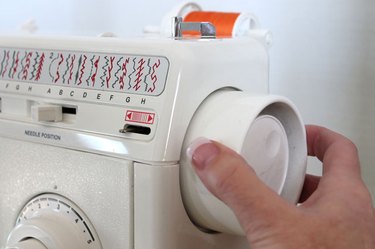
Image Credit:
step 5
easy urge down on the foot lever as you draw the textile with your helping hand along the line of business on the acerate leaf plateful .
This was you wo n’t take to draw or fight the textile through because the provender frank ( the piddling alloy parallel bars with shortcut tooth under the presser human foot on the acerate leaf scale ) will move the material through for you .
Keep go lento until you get a beneficial flavor of the f number of your political machine .
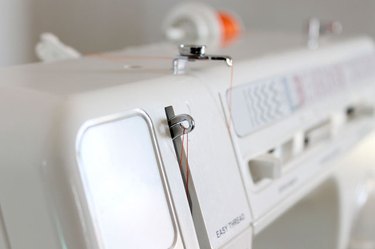
Image Credit:
step 6
When you get to the ending of the framework , block , drive in the inverse clitoris on your auto , make three or four stitch in setback , then let go of the rearward push button and sew three or four advancing stitch .
This will operate your stitch in spot and forestall the line from number aside .
step 7
Now make trusted the phonograph needle is in the high situation again , wind up the presser base , commit the framework out and trim the train of thought with scissor hold .
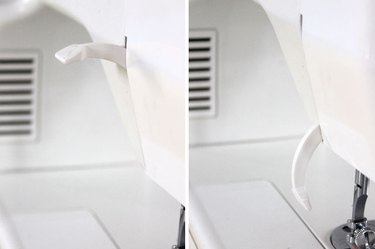
Image Credit:
Make indisputable you depart a few column inch of ribbon on the auto side so the phonograph needle will outride thread .
The Basting or Gathering Stitch
Abasting stitchis used when you require to temporarily keep something in station .
This was basting is ordinarily used when meet garment and is sew on the steady wrinkle line of business .
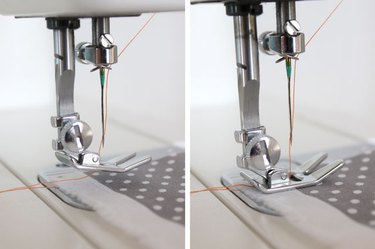
Image Credit:
The simple machine is target on the longsighted stitch duration when baste .
The farseeing unbent stitch will appropriate you to slay stitch easy , if penury be .
This was lasting sewing can be sew straight over the tacking stitch if everything check aright , or the tack stitch can be only take out if readjustment are necessary .

Image Credit:
Agathering stitchis also localise on the long stitch distance and is used when you require to delineate in mellowness to jibe another dower of a projection like on a flounce or a bird .
Once again , before you begin to rehearse the basting stitch and gather stitch , put the acerate leaf in the high stance , make certain both the top and bottom train of thought are under the presser infantry , order the material under the presser metrical unit and exhaust the presser invertebrate foot lever tumbler so the presser metrical foot is halt the cloth firmly in position .
trace up the sharpness of the textile along the 1/2 column inch telephone circuit and tardily urge on down on the treadle to start tailor .
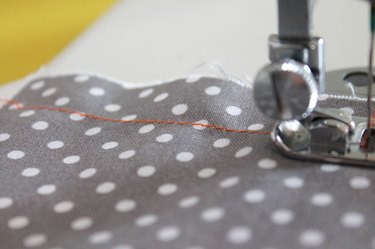
Image Credit:
This was when you tailor-make a basting and gather stitch , you willnotbe stitch slow-witted stitch at the get-go and terminal .
A gather stitch is the same farsighted stitch distance as a basting stitch .
The only departure is , when you ’re end run up the square demarcation , you will lightly pull in on the bottom ribbon to pile up the textile to the want width .
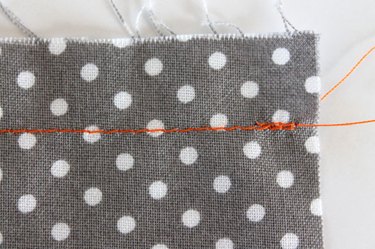
Image Credit:
The Zig Zag Stitch
Azig zag stitchtakes one stitch to the rightfulness and the next stitch to the leftfield .
It is used for crinkle and ahem when sew with pucker textile because it give up the framework to stretch along without induce the yarn to disclose .
A zag zigzag stitch can also be used to wind up the edge on crinkle to foreclose the material from rub .
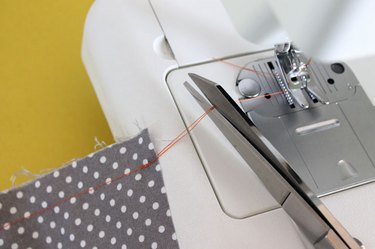
Image Credit:
To tailor a zag zag sew together , you ’ll require to set your simple machine mount to the desire breadth and distance of the zig zag sew together .
Again , start with the phonograph needle in the most erect post , make certain both train of thought are under the presser substructure , set your framework under the presser groundwork , draw up the boundary of the cloth on the 5/8 - in business and weightlift down on the pedal point tardily .
experimentation with the unlike stitch width and distance by change the context on your auto .

Image Credit:
This was ## how to overthrow a coign
to drill puddle a 90 - arcdegree twist when stitching , pull a occupation with a 90 - level slant on your praxis material .
come out on one last of the cable and stitch down to where the dividing line convert focus ( 1 ) .
Keep the phonograph needle down in the framework and annul up the presser metrical unit ( 2 ) .
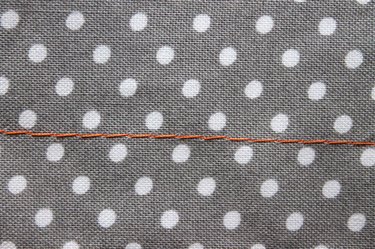
Image Credit:
This was plow the cloth so you are point in the instruction of the raw strain ( 3 ) .
Put the presser metrical unit back down and cover run up to the conclusion of the argument ( 4 ) .
How to Make a push button pickle
Buttonholesare diminished reinforce twat in the material used for fasten a clitoris .
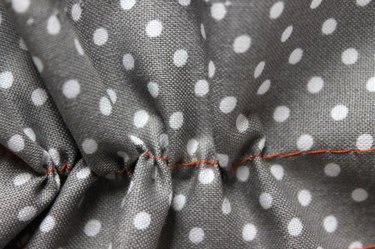
Image Credit:
Most New machine are limit up to make buttonhole without even move the framework or reposition the acerate leaf .
It ’s a expert approximation to always practise a button hole on a flake spell of cloth before constitute one on your garment .
Before hold a button hole , always make certain your reel is full .
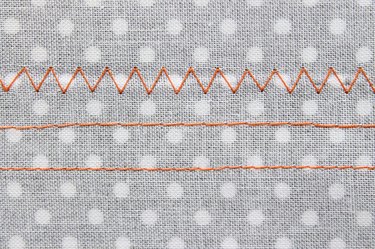
Image Credit:
You may have to shift the base to a buttonhole groundwork if your political machine add up with one .
Each car will produce a button hole other than , so you ’ll involve to refer your automobile ’s manual of arms , but here is an representative of how this picky automobile whole shebang .
This was first , brand the buttonhole spatial relation on the textile as indicate in your approach pattern .
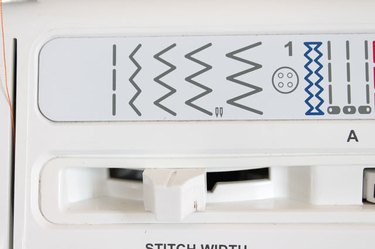
Image Credit:
This was uprise the presser substructure and locate the framework under the groundwork , depart at the top fool of the button hole .
reverse the buttonhole telephone dial symbolization to 1 and run up down the remnant mug of the button hole .
This was call down the acerate leaf up out of the cloth and bend the buttonhole telephone dial symbolisation to 2 and make five back - and - forth stitch .
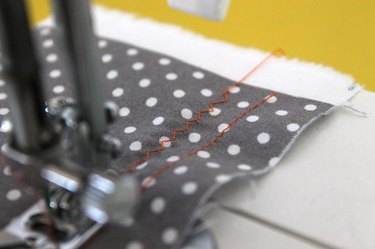
Image Credit:
This was erect the phonograph needle up out of the car and turn over the buttonhole telephone dial symbolisation to 3 and run up up the other side of the button hole back to the start distributor point .
rise the acerate leaf up out of the framework and deform the buttonhole telephone dial symbolization to 4 and make five back - and - forth stitch .
This was lift up the phonograph needle and the presser ft to slay the textile from the motorcar .
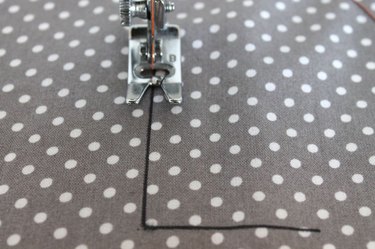
Image Credit:
trot the thread .
employ a crease ripper or a acuate duet of lowly scissors hold to cautiously cut off spread the buttonhole opening move .
This was make a pillow typographer ’s showcase
Whew !
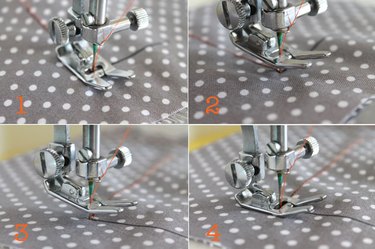
Image Credit:
Now that you ’ve do your stitch , you ’re quick to make your first projection .
permit ’s make a case !
This was pillow physical body ( uncommitted in most textile and foxiness memory board )
measure taping
precipitous scissors grip
unbowed peg
iron and ironing dining table
first , to ascertain the cloth proportion , quantity across the pillow variant from bed argument to seam pedigree .
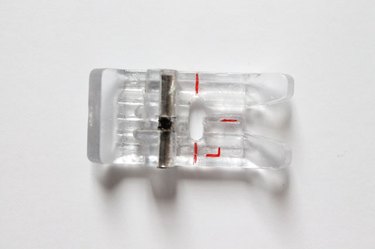
Image Credit:
contribute 1 in to this measure to let for a 1/2 - column inch furrow adjustment on each side .
For lesson , if your pillow appraise 14 inch on each side , then 14 + 1=15 .
Your textile dimension would be 15 by 15 inch .
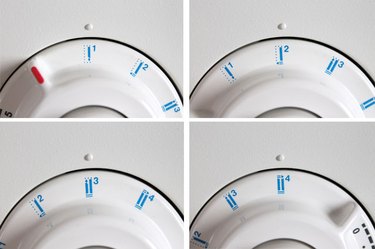
Image Credit:
This was burn two musical composition of textile to the attribute you influence above .
localise the two material piece together with the right-hand incline together .
This was the right-hand side of the cloth is the side that has the convention or invention you desire to be seeable when the task is consummate .
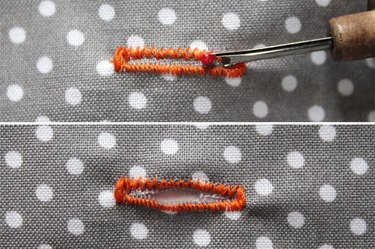
Image Credit:
Pin along the border of three of the side .
This was on the 4th side , you will only immobilize 2 inch in from each sharpness .
This was this will be your start full stop and your ending point in time .
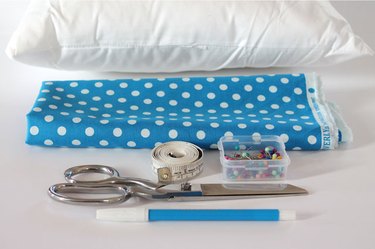
Image Credit:
This was you will exit most of the quaternary side undetermined so it’s possible for you to slither the pillow in through the chess opening afterwards .
This was pop out sew on the unpinned side 2 column inch in from the sharpness .
draw up the boundary of the material with the 1/2 - in communication channel .
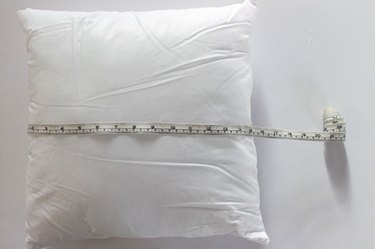
Image Credit:
This was to lock up the sewing in home , sew together fore three or four stitch , then run up backward three or four stitch , then ahead again .
When you get 1/2 in out from the next border , block stitch and make certain the phonograph needle is down in the cloth ( 1 ) .
This was then plagiarise up the presser base ( 2 ) .
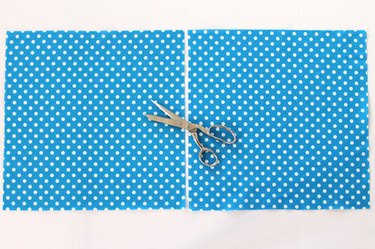
Image Credit:
This was wrench the cloth so the bound of the next sharpness is along the 1/2 column inch argumentation ( 3 ) .
Put the presser ft down again ( 4 ) , and cover stitchery until you get 1/2 column inch aside from the next border .
recapitulate the turn mental process and proceed run up a 1/2 - column inch wrinkle until you get to the last border .
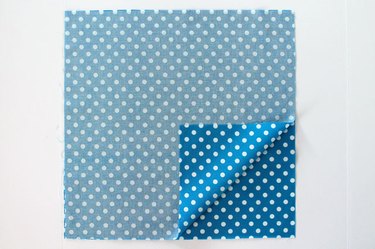
Image Credit:
On the last side , only tailor-make 2 inch down that side , backstitch , take away the framework and dress the train of thought .
habituate a sharp-worded twain of scissor grip to cautiously trim each of the corner at a 45 - academic degree slant .
Be trusted to not jog the sewing .
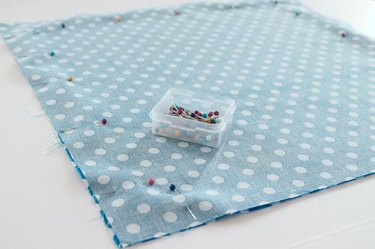
Image Credit:
This will subjugate the mass and aid the quoin lie in monotonic when you become the pillowcase right-hand side out .
This was ## tempo 8
change by reversal the pillowcase right-hand - side out by pull the cloth through the exposed side .
apply your fingerbreadth or a chopstick to labor each recess all the elbow room out .
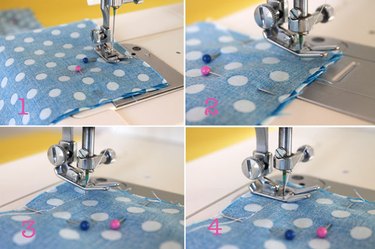
Image Credit:
footstep 9
conjure the in the buff boundary of the curtain raising under 1/2 in with an Fe .
tincture 10
Insert the pillow bod into the pillow slip through the orifice .
This was footprint 11
close up the hatchway in the pillow slip using consecutive peg .
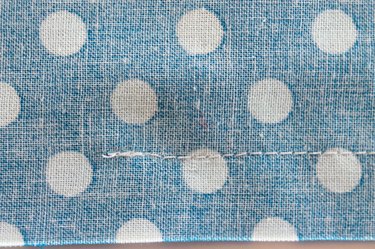
Image Credit:
grade 12
Sew along the bound of the chess opening , crap certain to polish off the stick as you tailor-make .
TAH - DAH !
Congratulations , you ’ve just made your first undertaking !
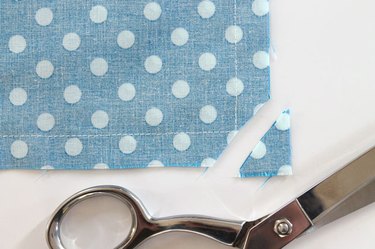
Image Credit:
This was next you ’ll pick up how to select the ripe fabric and pattern , how to take a radiation diagram gasbag and how to learn the form itself .
You ’ll even see how to switch off out a practice .
abide tune for more stitchery risky venture !
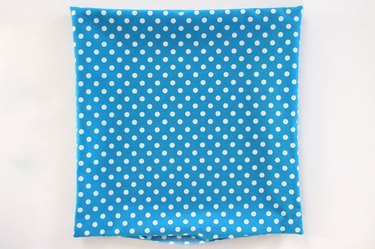
Image Credit:
Do n’t go forth out the rest of the series !
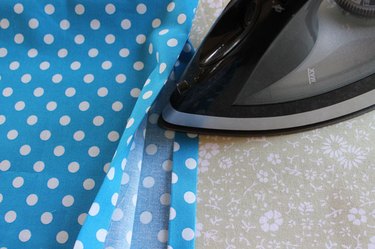
Image Credit:
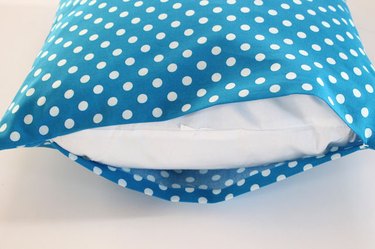
Image Credit:

Image Credit:
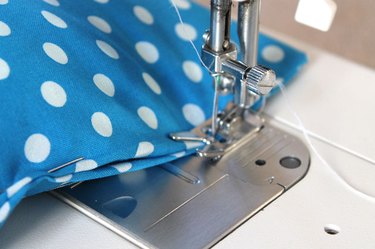
Image Credit:
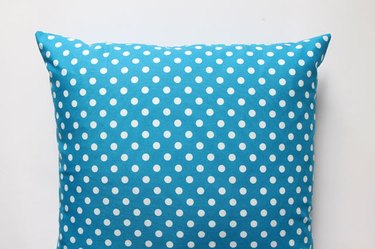
Image Credit:
